Explore the blog
Friday, March 7, 2014
Welcome to Day 2 of Ashley's 21st Birthday Blog Hop!

We are so glad you could join us! If you've come from Ashley's blog, you're in the right place! If you have just come across the hop and would like to start at the beginning, please visit Ashley at Made Especially For You.

This weekend we are celebrating Ashley's 21st Birthday with some fun and creative, birthday/alcohol-themed projects! It's not 21 without a drink or two, right?!

---------------------------------------------------------------------------------------------------------

I was SO excited when Ashley asked me to be apart of this blog hop celebration. She was such huge a help with my million Copic questions that I knew I wanted to create a card that showcased what I've learned so far. I tried to incorporate both a birthday and alcoholic theme at first, but it just wasn't working with my stamps. I wanted to use some Penny Black Mimi stamps and she seemed a little too wholesome next to the Jack and Coke. haha I just stuck to Mimi and it will hopefully remind Ashley of a more innocent time of birthday cake and streamers.


The background paper is from The Recollections Neapolitan Collections pack. I am so LOVING this paper! It's so fun! I cut the scallop die from the Elegant Edges Cricut cartridge and stamped my Penny Black Mimi stamp on it. I used some distress ink on the flag and the scallop cut forThe sentiment is from a $1 stamp pile from Michael's and I added the flowers to top off the card.
We have 21 fabulous sponsors providing 21 fabulous prizes for those who hop with us, and because there are so many of them, we have included all the prize information in the second stop of the lineup.
To be eligible to win, you must...
- Leave a comment on EVERY stop of BOTH days of the hop 
Winners will be randomly chosen and announced on Friday March 14th at Made Especially For You.
Your next stop is Angeline's blog. 

Here's the complete lineup in case you get lost along the way...

Day 2
Ashley
Hop Prizes
Michelle
Angeline
Pam
Madge
Stephanie
Erica
Georgiana
Julie O. 
Happy Hopping! :)
 
Tuesday, February 25, 2014
I had to create a thank-you card for someone and I wanted it to be extra special. I also wanted a reason to break out the Copics again. I recently bought these fun sunflower clear stamps and I wanted to try them out. I should have taken pictures of the many attempts. I first tried a pinkish/yellowish scheme, but my card was looking too much like Candyland! I decided perhaps natural colors would be best.


I used a Martha Stewart paper puncher to trim the white card stock and the orange background. I then decided to very lightly, sponge some antique photo distress ink on the edges. It's barely noticeable in the photo though. The sentiment was from a $1 pile I found at Michael's.

When I was stamping it, I got that Rod Stewart song, Forever Young in my head which I think is actually a cover of Bob Dylan. Go give it a listen. It'll make you smile.


Thursday, February 20, 2014
I try to make my boyfriend JP something special every year and this year was no exception. I found the cutest stamp from Joann's called Kissin' Kiddos and when it arrived, I started practicing! I should have taken a picture of all the attempts I made, trying to perfect the hair and clothing, but what matters is the end result.

You know, I don't say this very often, but I'm super super proud of this one.


I tried making the girl's skin color a little darker than the boy's since I'm Spanish (but seriously, with this winter weather, I'm as pale as he is these days!).

The background paper was from a Martha Stewart Valentine's Day pack I picked up from Michael's last year (always recycle your holiday paper!). I cut out the heart from the Sweethearts cricut cartridge and stamped the image on there. As for colors, I wanted to make this card very traditional so I stuck to the red/pink and blue/green palate.

JP really liked it so that made me even prouder of this card. I feel like I'm making progress on my copics too!


Monday, February 17, 2014
For Valentine's Day, I always make my Dad's card first. Probably because he was always my first Valentine and you know what they say about Daddy's girls.

When I saw this Penny Black stamp,  I knew I had to have it. It took me many tries with my Copics to get it just right- especially the pants!


I wanted to keep the rest of the card as simple as possible since the coloring took me a few days to perfect. I still think her skirt is a little off, but hey- I'm a beginner. At any rate, my Daddy-o loved it. So that's all that matters.


Wednesday, January 22, 2014
My boyfriend's Dad is a big fan of golf. For his birthday this year, I wanted to create something a little extra special since he had gotten me the best Christmas present ever! Thanks to him, I got to see Billy Joel at the Barclays Center on New Years Eve. Billy Joel is my all time favorite musical artist, so I was totally stoked to ring in the new year with him! (and my boyfriend, of course)


The patterned background was taken from a My Mind's Eye paper pack and I went over it with some Vintage Photo distress ink. The golf clubs are from the Wrap it Up Cricut cartridge, which I realized I hadn't used in awhile. For the lettering, I wanted Tee-rific to stand out so I cut the letters out and embossed each of them with my Versamark ink pad before rubbing some gold powder on them. In retrospect, I'm sure there was an easier (and neater!) way of doing this. Now I know for next time.


Stay tuned for some Copic coloring cards that I have been working on! FYI: coloring has never been this difficult for me haha.


Tuesday, January 7, 2014
So for Christmas this year, my friends and family kept asking me, "What do you want?" Every year around this time, I never seem to know what to say! I usually get gift cards to the MAC store or Michael's. It's hard to ask for physical things because there isn't anything that I really need. (Which is totally a good thing!)

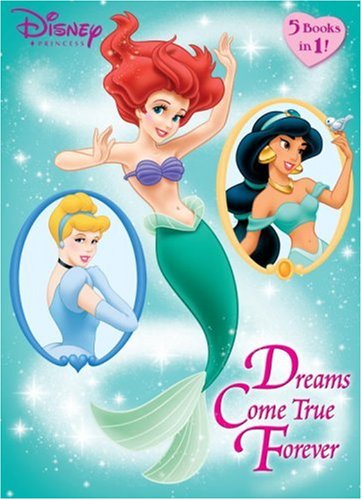
This year, I thought I would ask every person for a Dick Blick giftcard because I decided I wanted to learn how to color with Copics. I've dabbled a bit in the past with the limited supply that I have. (Those things are expensive, ya know!) But I really wanted to dive in because coloring is really relaxing. In fact, I used to buy Disney coloring books in college because it would relieve the stress from all the work I had to do.

Totally my favorite.
So thanks to my parents, my boyfriend (who also purchased two shelves for storage), my boyfriend's brother and his girlfriend as well as my boyfriend's sister and her boyfriend (are you tongue-tied yet?) I received over $300 for my Copics. Success!

My first order of business was to research!! What colors should I get? Which shades go well together? How am I going to figure out where my light source is coming from? I decided to ask someone who definitely knew what she was doing. Ashley from Made Especially For You is a certified Copic designer having taken both the standard and intermediate classes. She also teaches at local craft stores near her and I've been loving all the projects she's been posting on her Facebook. I decided to reach out and she was so nice! She gave me some really great tips and some addresses to blogs that were extremely helpful. Check out her projects below!

  • Get It Scrapped is a site that helped me figure out colors for a starter set.  Michelle Houghton wrote a SUPER helpful article with color combos including some of her personal favs and examples of colors she uses regularly. 
  • Scrap Girl is a site that has lots of great youtube tutorials and Angie shows you how to combine coloring Copics with distress inks.  
  • Scrap Bitz : Suzanne Dean is a REALLY helpful resource when it comes to Copics. She not only has several tutorials, but offers a GREAT PDF of all kinds of color combos with helpful tips and tricks. She also shows you how to color with distress inks. She uses a lot of Magnolia stamps which I like because they are super cute and can surprisingly, be a bit challenging to color.

A few days later, I was on my way to the Dick Blick store on Long Island. I told myself it was strictly for research purposes only!


 But of course I could not resist buying a few.


However, I do recommend that if you are buying Copics from Dick Blick, buy them online. They are cheaper and if you order enough, shipping is free. #totallyworthit I ordered the rest online and last night I came home to a HUGE package.

Behold thy present from Father Christmas!


I am so excited to start practicing!

Do any of you use Copics? What color combos do you like? What stamps do you use?


Thursday, January 2, 2014
As promised, here are the rest of the cards I made for 2013. Again, they were not nearly as many as I had wanted to make, but people were forgiving. I have decided to follow in the footsteps of my friend Amy from Scrap This, Save That. She had an idea for a Christmas Card Catch-Up where she made cards throughout the year and it was a pretty successful venture. I think I'm going to try that and create about 1-2 cards a month and see where I am next December.

This year, I focused on snowflakes. I recently got the Cricut cartridge, Winter Wonderland and there were so many nice die-cuts available.


Before adding this snowflake with 3D zots, I embossed some smaller snowflakes on the card. I ended it with the sentiment, "Let it Snow" which I got from Michael's for a dollar.


For this card, I embossed the writing on the card first and went over it with Antique Linen and Vintage Photo distress ink. The Believe sentiment also came from the Winter Wonderland cartridge along with the snowflake. This had to be my favorite card of the season.


This next card, I embossed a stocking stamp I had with green glitter powder. I used a Martha Stewart paper puncher for the bottom and I added peppermint twine to the top. The sentiment came from this adorable stamp I found at Paper Presentation which is this wicked store in NYC that sells every type of paper you can imagine.


For this card, I wanted to emboss using two different colors so I used a small paint brush to apply the gold on the antlers and red on the body of the reindeer. It actually wasn't as hard as I thought it was going to be. (Or as messy!)

This last card was made with the Winter Frolic cartridge. The snowman's face was made with a Peachy Keen stamp and I added some peppermint twine to the base of the snow globe.


That's All, Folks. Until next year! (or next month!)